Category Archives: Cooking

Back to Food, Fashion, and Fitness

Hello, again! Food, fashion, and fitness are still my favorite topics (and a hell of a lot less controversial than politics, publishing, and pets, which I write about elsewhere).

Let’s start with the food

In the eight years since I put this blog on hiatus, I’ve discovered I can’t digest wheat very well. This is different from being celiac, or having an allergy to gluten, but it drives me to select “gluten-free” products in the store and in restaurants. Discovery: Many of them are pretty awful.

So what I’m going to do here is list some of the non-awful wheat-free and gluten-free products I’ve discovered. Obviously, if you can’t eat wheat or gluten, you’ve likely discovered products of your own (or you have completely reorganized and restocked your kitchen so you can make time-consuming and convoluted recipes—which I admire, but have no intention of doing).

This is list is more for folks who want to cook or eat wheat-free, and want easy-to-make products they could slip past guests without anyone noticing the difference. In other words, wheat-free products that taste either great, or fairly neutral. It’s also perfect if you are entertaining guests who can’t eat wheat or gluten.

Here we go:

Pasta

After throwing out several popular brands of gluten-free pasta because the noodles were heavy and/or stuck together like glue and/or tasted ghastly, I am happy to introduce you to Le Veneziane pasta. It’s made from corn. The taste is quite neutral, it’s not gluey or gummy, and it’s perfect to use with a fairly robust tomato sauce–and quite delicious with a traditional Italian mushroom sauce. You can find it at Amazon, too.

Bread

My experiences with gluten free breads were so grim (again, buying loaves of bread, eating one slice, and…guiltily wasting the rest of the “loaf”) that I’d just about given up. Especially after going to Manhattan and dining at an acclaimed gluten-free restaurant in Hell’s Kitchen. Their expensive bread was bland in flavor and utterly uninteresting in texture. I wouldn’t waste the calories on it.

So…imagine my surprise when I discovered Schar breads, most of which are made in Europe and are shelf-stable until the package is opened. When toasted, they’re perfect substitutes for wheat bread. The bagels are actually…tasty. (And this is the opinion of a Jewish woman who lived in NYC! )The white bread is fine for a ham sandwich or PB&J, and the hot dog rolls (again, toasted) are quite decent for hot dogs or sub sandwiches. My one caution about Schar breads? They will not absorb liquids. Forget trying to make French toast. Or, amuse yourself by trying and watching the slices float in the egg batter. Good news: You can find a pretty good selection of Schar breads at most Kroger grocery stores.

Cornbread and Muffins

Before trying to buy all sorts of flours and figure out my own recipes, I decided I’d try some boxed mixes by King Arthur and Red Mill. Again, both brands are available at the regular grocery store.

The King Arthur mixes (cornbread and muffin) bake up nicely. Like all the commercial gluten-free muffins I’ve had, they are heavy and sticky and very sweet. The cornbread was essentially a New England style corn muffin. But tasty. Oddly, both of these mix muffins tasted much better on the second day.

The Red Mill cornbread was the opposite of the King Arthur—a bit dry, and not sweet at all. In short, a Southern-style cornbread. It was best on the first day, and then too dry on the second day. I’d say you could definitely pass this off as a traditional cornbread.

Schar makes a chocolate muffin that is…to die for. A wonderful treat, and you could put frosting on the top to make it a cupcake. Again, something you could serve without anyone noticing it as gluten-free.

Tortillas

The first solution was, of course, to switch to corn tortillas (but watch out, some corn tortillas also have a bit of wheat flour).

When I really missed soft, floury wheat tortillas, I tried a variety of gluten-free tortillas made from a truly mind-boggling array of ingredients, including cassava and spinach. They were all pretty decent. But the one that has absolute won me over is the Ole tortilla made from chick pea flour (garbanzo flour). It’s thin, it’s light, and the taste is very neutral.

Sadly, my husband can’t digest chick pea flour. But I can easily get him the regular wheat flour tortilla when I make burritos.

Pie Crust

I think my big gluten-free success story is pie crust, made by simply substituting King Arthur 1-for-1 gluten-free flour into my favorite pie crust recipe.

The first time I whipped up the recipe, all went well until I rolled it out and got ready to flip the dough into a pie plate. It crumbled like sand, and I panicked. Luckily, I went back and consulted the King Arthur website. It instructed me to treat it like a graham cracker crust, and just press the sandy crumbs into place. When it came to the top crust, I rolled out the dough and used a large cookie cutter and a spatula, flipping six parts of a top crust into place on the pie. When baked, the crust comes out just like a traditional wheat crust. Magic!

While my training with wheat flour crusts had taught me never to over-handle a dough, it turns out you can handle this gluten-free dough all you want. You can even freeze it. I found the frozen-and-thawed dough made a slightly fluffier pie crust.

The only caution would be that the final texture of this crust is a shade gritty. This is fine with a savory pie, or a cooked fruit pie. It might not work as well with a chiffon pie.

Next time: gluten-free crackers

You can’t take grits for granted if you live in Seattle

I grew up in the South and acquired a taste for grits. I generally make the “quick cooking kind.” If I can, I eat them with the traditional slice of salt-cured ham and some red-eye gravy. But mostly it’s just grits, with butter and pepper.

bowl of grits

Grits with butter and pepper

Until a few months ago. I made some grits and they were just awful, which I attributed to the grits being stale. We bought a new box, cooked those up, and — yecch! The problem, I decided, is that not enough people in Seattle eat grits, so just about any box you buy is already too old. Way too old.

Obviously, I needed to buy my grits from a store where the turnover is high: that would be in the South. I went online and discovered that the authoritative traditional grits company is McEwen & Sons in Alabama, grinding corn for many of the top chefs in the South. They essentially reinvented grits, using organic corn and going back to the stone-grinding methods of the past. They sell to the better supermarkets and sell their products online.

I ordered two small, sealed bags of organic white grits. Success! Cooked for 20 minutes, they taste like — real corn grits. The rough, varied texture is delightful. I’m confident that I’m now eating grits as good or better as those you’ll get in most restaurants in the South.

But — it turns I could have gone deeper in my search for serious grits. I could have gone to Anson Mills in South Carolina. Their website has a long, long read about the owner, a California entrepreneur and chef who married into a Southern family. He started Anson Mills to preserve Carolina Gold rice, an heirloom rice. The mills expanded to other grains, including corn, wheat, rye, oats, buckwheat, and farro. Their retail corn products include Antebellum Grits, Colonial Coarse Pencil Cob Grits, Native Coarse Blue Corn Grits, and Henry Moore Yellow Hominy Corn. They also sell cornmeal and polenta (including a polenta made from heirloom red trentino flint corn, long used in Italy).

But ordering from Anson Mills is not a transaction; it’s a relationship. The products are shipped at -10 F and must be refrigerated or frozen when they arrive. The company has a minimum order of four 12-oz. bags of grain or one 10-lb. box. And, the website cautions, you can’t use these grains with your regular recipes; they come with their own.

Well, I discovered I’m not really that much of a foodie. I just wanted my grits! And, thanks to McEwen & Sons, I’ve got them.

What about ham, you ask? Perhaps you remember the year I ordered an entire uncooked salt-cured country ham, had a Seattle butcher slice half of it into biscuit slices for me, and cooked the rest (removing the rind halfway through) in maple syrup? Ah, those were the days! Have you seen the price of a salt-cured ham recently? It would be cheaper to fly to Charleston and go out for breakfast.


Summer food ideas with a bit of a twist

A quick list of summer food ideas with a bit of a twist:

1. Grilled pita breads stuffed with spiced ground lamb

The idea here is that the lamb fat soaks through the pita bread, which then crisps on the grill. I’ve seen references to this dish twice in as many days, but in print (Bon Appetit, and the Wall Street Journal’s restaurant section), not online. It inspired me — but first I’m making the lamb shish kebab in Rachel Hogrogian’s Armenian cookbook.

2. Gazpacho in aspic

gazpacho
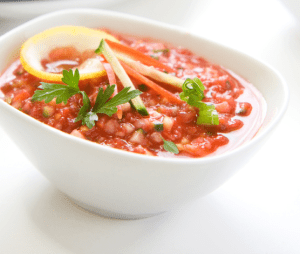
My foodie friend Diana Herbst told me she’d been at a party where someone brought a gelled, molded gazpacho. I use the Elena’s Mexican cookbook recipe, so I’d adapt that recipe to a gelatin recipe from Cooks.com.

3. Natural ambrosia

I know someone who calls her ambrosia (made with strawberry Jello powder, cottage cheese, canned fruit cocktail, mini-marshmallows, and Cool-Whip) “pink shit.” And with good reason, when you look at all the sugar and corn syrup involved.

I decided to see if I could do a more natural version. It starts with lots of fresh strawberries (raspberries, blueberries, pears, peaches, and grapes would also be good). Whip 1 cup of cream with 1 small package of plain gelatin (softened) then add 16 ounces of small-curd cottage cheese and two tablespoons of sugar. Add the fruit and two cups of mini-marshmallows (which DO have corn syrup). I put in a few drops of a natural red food coloring that I use to make frosting. It was pretty wonderful — though probably not as much of a rush as the genuine stuff.

Another natural approach, complete with homemade marshmallows, comes from Alton Brown.

New Haven Pizza Recipe

Cooked pizza with tomato sauce, mozzarella, ham, mushrooms.

Cooked pizza with tomato sauce, mozzarella, ham, mushrooms.

Michael Maffeo Snow and I developed this recipe in the 1970s while living in New Haven. Note that this is a New Haven, not New York or Neapolitan (NEO), crust. The crust recipe uses lots of water and very little oil. The toppings should be fairly light, but intense in flavor. (I’ll write a second post on toppings.)

Equipment

Your oven must be able to hit 450F degrees; 500 or 550 is even better.

Pizza on pizza stone in oven

Pizza on pizza stone in oven

It helps if you have a restaurant-style pizza stone ($9) for the oven and a basic wooden pizza peel (all of $7) that you’ll use to slide the assembled pizza onto the hot stone to cook. (After two expensive gourmet-store pizza stones cracked, I finally bought a $9 pizza stone from a restaurant supply store in Chicago. I keep it on the bottom rack of the oven all the time, and move it up to the middle to make pizza. It’s lasted more than 10 years.) If you don’t have a pizza stone…well, I’ve seen people use the flat bottom of large, upside-down cast iron skillet or griddle. As long as it’s been preheated in the oven.

Ingredients

1 cup tepid water
1 pkg dry yeast
1 tsp sugar
1-1/2 cups all-purpose flour, plus about 1 cup more for the board in the kneading phase
2 tsp salt
olive oil to grease bowl
fine cornmeal for the pizza peel
toppings of your choice

Directions

Phase 1 (less than 1 hour)

Dissolve yeast and sugar in 1/4 cup warm water.

In a separate (large) bowl, mix the salt into 1-1/2 cups of the flour. Add the remaining 3/4 cup of water to the flour mixture.

When the yeast begins to foam a bit, add it to the flour mixture. Stir vigorously, and add the rest of the flour. Turn the dough onto a floured board and let it rest (safe from cold drafts) while you clean the bowl. When the bowl is clean and dry, rub the interior with a light coat of the olive oil.

Knead the dough continuously for 15 minutes, adding flour  as necessary (up to an additional 1/2 cup of flour, even 1 cup if you feel confident of your ability to judge doughs), to create a silky dough. Return the ball of dough the bowl, roll it around to coat it with the oil, then cover bowl with two tight layers of plastic wrap.

Phase 2 (2 to 3 hours)

Let it rise in a warm (but not hot) place until double in bulk, about 2-3 hours.

Phase 3 (2 to 24 hours)

Punch down the dough, divide in half, wrap the halves in plastic, and refrigerate for at least 2 hours. 24 hours is ideal.

Phase 4 (1 hour)

assembled pizza

Assembled pizza on wooden peel

When you are ready to make pizza, preheat the oven, with the pizza stone in it, to 450 degrees F — or, if your oven is capable, 500 or 550 degrees.

While the oven is pre-heating, take out one of the dough halves and place it on a floured board. Pounding with the heel of your hand (or using a rolling pin), work the half into a pizza about 12-inches in diameter. (Of course, you could lightly flour your hands and spin the dough in the air until until it is 12″ in diameter. If you try this, be prepared to get a light shower of flour all over your kitchen.) Note that New Haven pizza does not have a gigantic outer crust. So feel free to stretch the outer rim of the dough. It will puff up a bit on its own in the oven, just because it doesn’t have toppings on it.

Sprinkle the pizza peel or a large cutting board with some fine corn meal and place the flattened dough on it. (How much corn meal? Enough to enable you to slide the dough from the peel onto the hot stone in the oven.)

After it’s on the peel, brush the dough lightly but thoroughly with olive oil and then add your sauce and toppings, with a light touch. (My lecture on hand-crushed San Marzano tomatoes as opposed to tomato sauce will be delivered at another time; all I’ll say here is that if your sauce or tomatoes are too watery, use a strainer first. You don’t want the dough to get drenched.) If using plain canned tomatoes rather than an herbed sauce, finish with a sprinkling of dried oregano.

When the oven is ready, slide the pizza from the peel or sheet onto the pizza stone in your oven. Bake 15 minutes or until the underneath of crust is light brown. Remove, slice and serve. Repeat with second ball of dough.

Meatloaf pans, crock pots, and creme brûlée sets

If you make old-fashioned meatloaf, you just have to try a meatloaf pan with a lift-out liner. The liner keeps the loaf about 1/4 inch above the bottom of the pan, preventing the meatloaf from sitting in a pool of grease but keeping the meatloaf moist via heat from the warm liquid.

Meatloaf pan with linerThe picture is of the Baker’s Secret pan I use, with an enamel rack. It’s not longer available, but there are similar items on Amazon.com from Chicago Metallic, I strongly recommend the ones with the long, narrow liners — the finished meatloaf lifts right out and doesn’t have to be pried out of a liner pan.

So, speaking of the meatloaf itself: Last night the Scholarly Gentleman made a beef/pork meatloaf that included…toasted pecans. The result was very good, but very rich. This is meatloaf for company — reminded me quiet a bit of kibbeh with pine nuts.

The discovery that my wonderful meatloaf pan is no longer available brings me to my latest vintage kitchen gadget: The Hamilton Beach Crock Watcher crock pot with Auto-Shift!

The Scholarly Gentleman likes to make bean soup with ham hocks and also slow-cooked chicken thighs. My response to this has been “so use the stovetop” but we have kept our eyes open for a mid-size crock pot.

The Crock Watcher crock potFortunately, we live in a Scandinavian neighborhood where estate sales are a treasure trove of Dansk teak, stainless steel, crystal, and superb cookware (especially Nordic Ware ebelskiver pans). Today we spotted a 60s-era crock pot in pristine condition, complete with original instruction manual, for $8. The Auto-shift setting allows you to start it on high and have it automatically turn itself down to slow cooking after 1-3/4 hours.

Veering from the practical to the frivolous, I dropped $5 on a Bialetti Creme Brulee Set — four white ceramic ramekins and a little butane blow torch.

creme brulee setWhile rationales like “Oh, wouldn’t it be fun to cook [insert ridiculous dessert here]” rarely work for me, the fact is that creme brulee is the dessert the Scholarly Gentleman and I are most likely to order when we go out. So perhaps it does make sense to try it at home. Once again, I discovered that this item is no longer available (original price: $35), but that it got 5-star reviews on Amazon when it was and that this basic Oggi set appears nearly identical.

The perfect pie (pan)

We haven’t hosted a large Thanksgiving in several years, so I can afford to use Thanksgiving as the opportunity to test the kitchen’s readiness for the December holidays. I make a list of what’s missing and, of course, discover what aging piece of equipment is about to give up the ghost. (This year, the toaster oven suddenly lost it while trying to heat a casserole dish full of extra stuffing.)

As usual, I volunteered to bake pies for the Thanksgiving feast we were invited to at our friends’ house. I love to bake piece because I have such great pie pans, especially this one, for fruit pies:

Apple pie

Apple pie in vintage HOLZIT pie plate with deep lip.

It is a medium-size (9-inch) pan with a wide, deep lip that catches any bubbly juices from the pie. That means I don’t have to fit foil-covered cookie trays beneath my pies or spend the next few days trying to chisel baked sugar syrup off racks or oven surfaces.

It’s not easy to find a HOLZIT aluminum pie plate! I inherited one, and I’ve spotted one or two on eBay over the years. There’s also a new $49 Royal Prestige 11-inch stainless steel pie plate with a wide, medium-depth, lip — pricy, but pretty wonderful (and available only through distributors or on eBay).

The Royal Prestige is notable because it’s an 11-inch pie plate — not easy to find in stores.  You can still find 11-inch vintage Pyrex (#211) on Etsy or eBay for about $15.

(The pie plate in the background, containing a pecan pie, is a 9-inch vintage anodized aluminum by Regal. It has a wide, but not deep, lip. You can find them, as I did, on eBay.)


Heirloom cantaloupe

I noticed two kinds of cantaloupe at the market last month: a regular cantaloupe and an heirloom cantaloupe distributed by Peacock Produce (a label of the Turlock Fruit Company in California). On a lark, I bought the heirloom melon. It’s fabulous! Rich, and perfumey with a creamy texture.

I’m wondering if this is a Northwest regional delicacy. One of the  few mentions of it I’ve found online is from a Vancouver (BC) food blog, which has an intriguing recipe for a tomato-and-cantaloupe fruit salad.

Pasta with Clam Sauce

For a long time, my white clam sauce was hit or miss — sometimes adhering nicely to the pasta, but often watery. I saw recipes that advised using a thickener or adding cheese to the sauce, but I was pretty sure that wasn’t the way to go (particularly since in Northern Italy I’d learned that fish and cheese are rarely allowed in the same dish).

I came to my solution after buying a lot of Bar Harbor clam stock and clams. Now I sautee some chopped or crushed garlic in two or three tablespoons of mild olive oil in a large pan, then pour in an entire 15-ounce can of clam stock and cook it down to a few tablespoons. When the pasta is just about cooked I toss  chopped fresh parsley and chopped clams (the contents of two 6.5 ounce cans) into the reduced stock. Add pepper to taste, and spoon it over your pasta.

This amount of sauce will serve two or three people.

The quality of clams is critical to the success of this recipe, as is the fresh parsley. Cheap, fishy canned clams — ugh!

You can get the Bar Harbor clams (by the 12-pack) and clam stock (by the six pack) from Amazon.com, or ask at one of the better grocery stores. Ballard Market used to carry both, but now for some reason only has the stock. Go figure!

Have you ever heard of Yummy Mummy cookies?

Apparently they are a Halloween tradition. Very cute.